
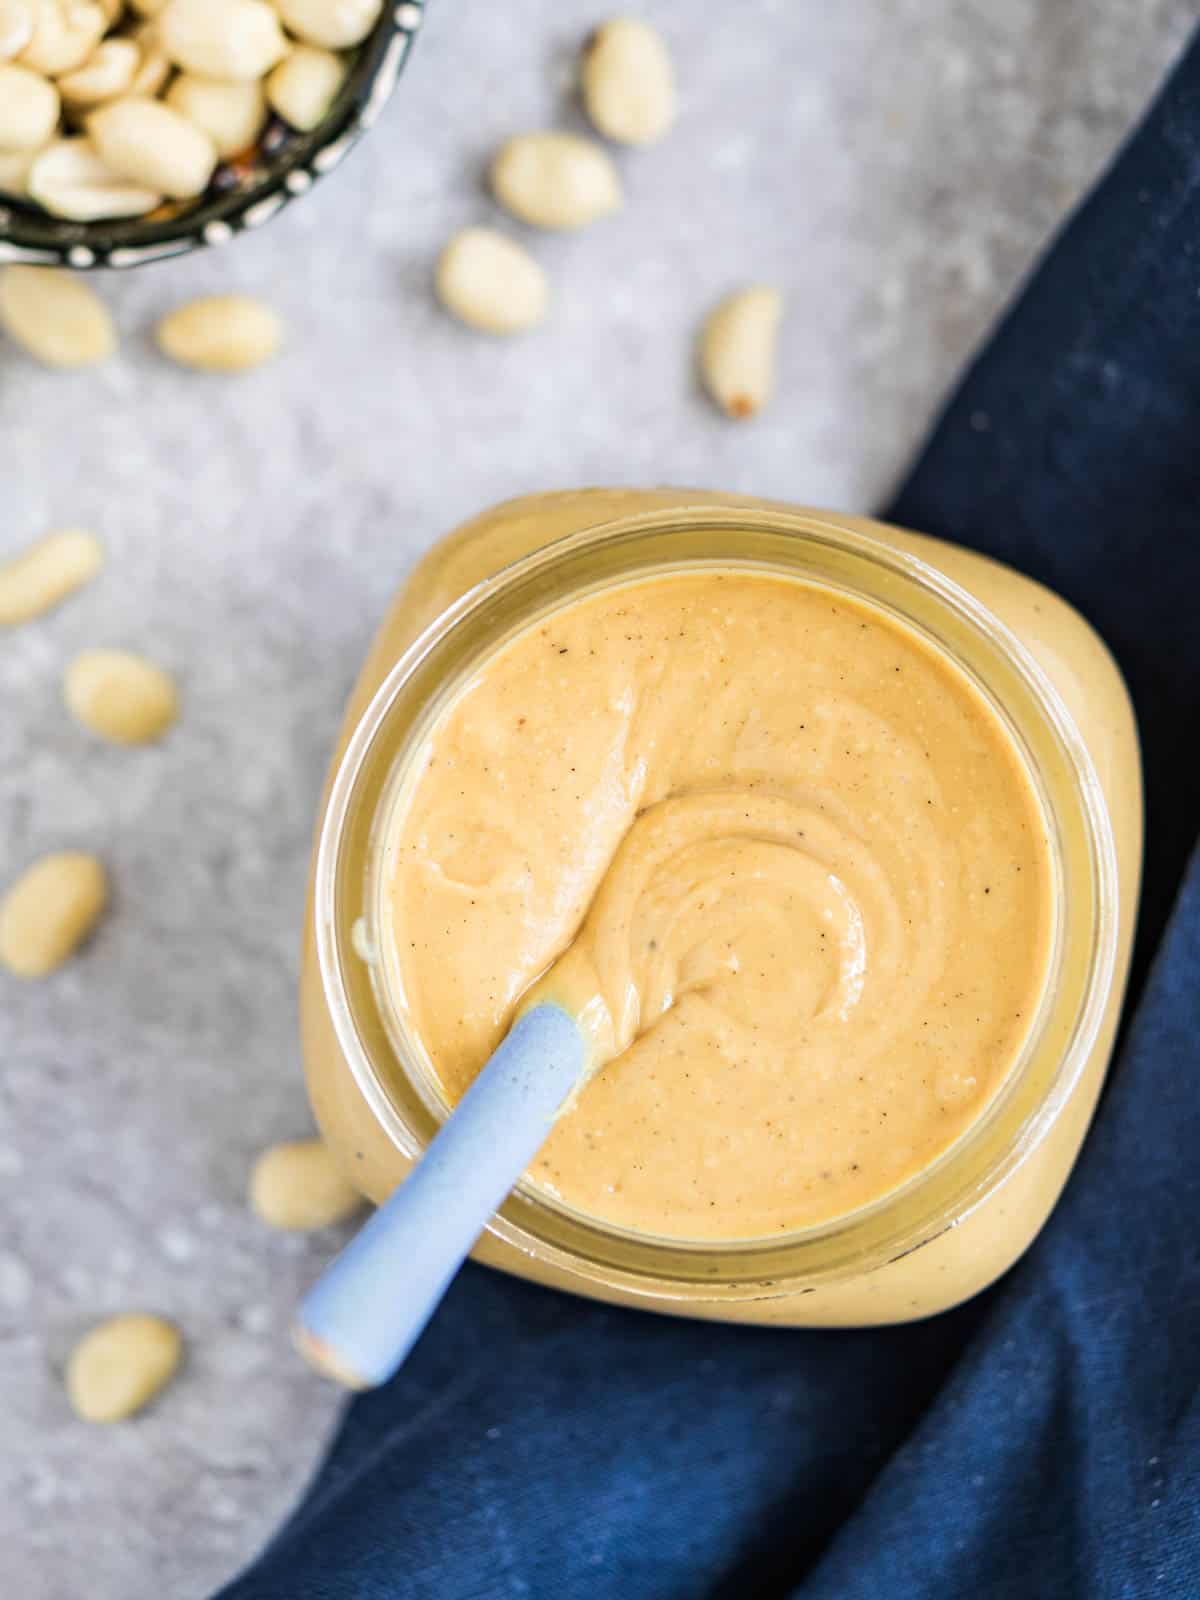
Making your own homemade peanut butter recipe is a game-changer. With just roasted peanuts and a food processor or high-speed blender, you can create a smooth, creamy spread that's free of additives. This simple recipe brings out the natural flavor of peanuts, making it far superior to store-bought varieties.
Save This Recipe 💌
One of the best parts about making peanut butter at home is the satisfaction of knowing exactly what's in it. Without any preservatives or additives, it's a healthier option that tastes incredibly fresh, and you only need one or two ingredients to make it.
I love experimenting with different add-ins, like a touch of honey, a sprinkle of cinnamon, or a spoon of cocoa powder to create unique flavor combinations that my family, especially my kids, enjoys. It's always a hit, and I feel great about serving it.
Homemade peanut butter is so versatile in our kitchen. We spread it on coconut flour banana bread, apple muffins, drizzle it over oatmeal, or blend it into smoothies.
It's also a fantastic ingredient in baking. Adding a scoop to edible cookie dough or sweet potato brownie batter takes desserts to a whole new level. Knowing it's homemade makes every bite even more special!
Jump to:
Why You'll Love This Peanut Butter Recipe
- Allergy-Friendly Option: With no tree nuts included, this homemade peanut butter is a great choice for those with nut allergies or sensitivities. It's a versatile kitchen staple that works for everyone.
- Customizable Ingredients: Made without added oils, salt, or sugars, this recipe puts you in control. Adjust the texture and flavor to suit your preferences, from creamy to crunchy.
- Multi-Purpose Spread: Perfect for drizzling over easy buckwheat pancakes, blending into smoothies, or mixing into recipes like the peanut vinaigrette for a crunchy kale salad. It's a pantry essential for both savory and sweet dishes.
Peanut Butter Recipe Ingredients
You'll need the following ingredients to make healthy homemade peanut butter:

Homemade Peanut Butter Ingredient Notes
- Peanuts: Choose raw, unsalted peanuts for a pure taste. The natural oils in peanuts make additional oils unnecessary. For a change, try using raw almonds for homemade almond butter.
- Sea Salt (optional): A pinch can enhance the peanut flavor.
- Vanilla Powder (optional): Adds a rich depth. Vanilla extract works well if added at the very end of blending.
See recipe card below for all ingredients and quantities.
Top Tip
No need for extra oil; peanuts release their natural oils when blended.
How To Make Your Own Peanut Butter

- Step 1: Start with 4 cups of raw peanuts: I prefer raw organic peanuts for their purity and nutrition, without additives.

- Step 2: Roast the peanuts: This step is optional, but roasting at 350°F for about 10 minutes really brings out a deeper flavor. Let them cool completely before you blend to prevent overheating.

- Step 3: Blend the peanuts: Use a high-speed blender or food processor. Blend until creamy, using a tamper tool, or scraping down sides as needed. The peanuts will start with a crumbled texture, then clump together, then start to get smooth but gritty, then creamy and glossy.

- Step 4: Optional add-ins: If you'd like, add a pinch of sea salt, cinnamon, or a bit of vanilla at the end to enhance the flavor. Enjoy your homemade peanut butter!
DIY Peanut Butter Tips
- Cooling Peanuts: Let roasted peanuts cool before blending to prevent overheating.
- Chunky Peanut Butter: If your favorite recipes include crunchy peanut butter, blend the peanuts for a shorter amount of time, or mix in a chopped cup of the roasted peanuts to the smooth peanut butter.
- Chocolate Peanut Butter: Similar to nutella but with peanuts, mix in abut ¼ cup of cocoa powder near the end of blending. If the peanut butter is too dry, add a neutral oil, 1 teaspoon at a time, until you've reach the desired smooth consistency.
How to Use Homemade Peanut Butter
Peanut butter is one of those staples that never goes to waste in my kitchen. Of course, it's amazing on toast, swirled into oatmeal, or blended into smoothies, but it's just as fun to bake with.
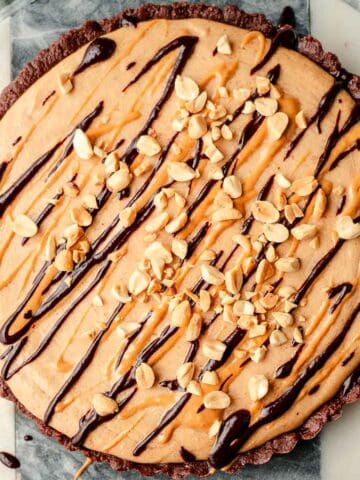
Try it in my chocolate chip peanut butter cookies (internal link) for a classic treat, or whip up a batch of these chocolate peanut butter rice crispy treats (link) for an easy no-bake snack. If you're in the mood for something extra special, my peanut butter pie (link) is a crowd-pleaser that highlights peanut butter in the best way. Of course, a spoonful straight from the jar never disappoints.
Homemade Peanut Butter Common Questions
Yes, but they may require added oil as commercial processing reduces natural oils. Spanish peanuts, however have a slightly higher oil content, though they have a red skin which will effect the creamy texture.
Can I use less than 4 cups of peanuts?
4 cups (584 grams) works well because it's enough nuts to allow the blades in the high speed blender or food processor to do its job. You'll need a rubber spatula to scrape down the sides of the bowl of a food processor or high-powered blender.
I highly suggest you refrigerate your peanut butter. Refrigeration extends freshness up to 3 months. If stored in a cool dark place, consume within a month.
Absolutely! Add a small amount of sea salt to enhance the flavor of the peanuts. Honey or maple syrup will add some sweetness, or cocoa powder for a nutella-like chocolate peanut butter. The add-in should be added at the end of blending.
Homemade peanut butter will keep well in an airtight jar in the fridge for up to one month. Since it doesn't contain preservatives like store-bought versions, it won't last quite as long, but you'll probably finish it faster anyway!
The oils may separate over time, which is totally normal. Just give it a good stir before using. If you prefer a softer, even more spreadable texture, let it sit at room temperature for 10-15 minutes before serving.
Storing Homemade Peanut Butter
Natural homemade peanut butter has a shelf life of up to 1 month in the fridge. It can be kept at room temperature for a couple of weeks, but only in cooler environments and when stored in a cool, dark cupboard or pantry. Store in an airtight container or mason jar with a tight fitting lid.
Recipes Using Peanut Butter


📖 Recipe

Recipe For Peanut Butter
Equipment
- 1 large rimmed baking sheet
- 1 high-speed blender or food processor
Ingredients
- 4 cups (584 grams) raw organic shelled peanuts
- ¼ cup (55 grams) neutral oil like avocado oil or coconut oil optional
Instructions
- Preheat oven to 350°F. Line a baking sheet with parchment paper and spread the raw peanuts without overlapping. Roast for 10 minutes.4 cups raw organic shelled peanuts
- Allow roasted peanuts to cool completely, then transfer to your blender or food processor.
- Using a high speed blender: Place the lid on your container and replace the cap with the tamper. Blend on high, using the tamper tool to coax the nuts into the blades. It will take about 2-2 ½ minutes to achieve smooth peanut butter. Add oil if you want a smoother consistency.¼ cup neutral oil like avocado oil or coconut oil
- Using a food processor: Place the lid on your container and blend, stopping periodically to scrape down the sides of the container with a silicone spatula. It will take about 4 minutes to achieve smooth peanut butter. Add oil if you want a smoother consistency.
- Transfer the peanut butter to a glass jar with a tight fitting lid.
Save This Recipe! 💌
Notes
- Peanut butter will last up to 6 months in the fridge or 1 month in a cool, dark cupboard or pantry.
- You can always add a pinch of salt, honey or vanilla extract at the end of blending.
- For crunchy peanut butter, blend the peanuts for a shorter amount of time, or mix in a chopped ¼ cup of the roasted peanuts to the smooth peanut butter.


Allison says
I'm always a sucker for homemade peanut butter! its so much better than store bought - this recipe turned out SO good!
Jacqui Wilson says
Hi Allison, I'm happy you enjoyed the peanut butter!